Block yourself from using TikTok on a Windows computer
Prevent yourself from using TikTok on a Windows computer either permanently or temporarily

If you are trying to restrict yourself from accessing TikTok, you might have tried deleting the app only to find that you could easily reinstall it from Microsoft Store and use it again.
You might have also noticed that it's possible to access the TikTok app from a web browser like Google Chrome, so deleting the TikTok app isn't always effective.
In this guide, we'll walk you through the Windows instructions for blocking TikTok using approaches that work when you are trying to prevent yourself from accessing TikTok. We'll also go through strategies for permanent or temporary TikTok restriction.
Is it worth completely restricting yourself from using TikTok on your Windows?
Here are a few of our top reasons why you might block TikTok, restricting yourself from accessing it entirely on a Windows computer:
Inappropriate TikTok profiles can be difficult to filter out
TikTok profiles are often used to advertise adult content either subtly or blatantly. This can be a particular problem if you are trying to prevent yourself from seeking out or accidentally finding adult content.
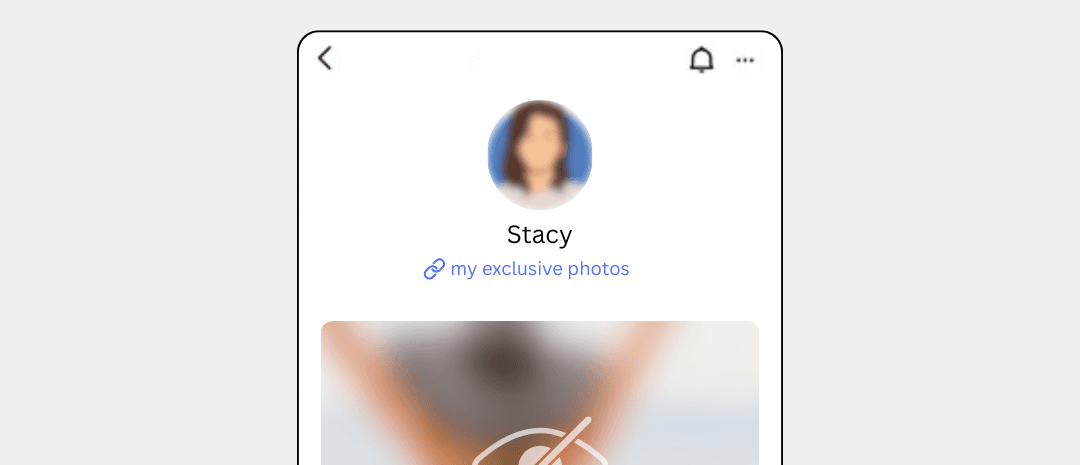
TikTok might suggest inappropriate content
TikTok might suggest images or videos that you'd rather not see. Even if your profile preferences are adjusted to hide obvious explicit content, TikTok might still suggest content that can be a "stumbling block" for you.

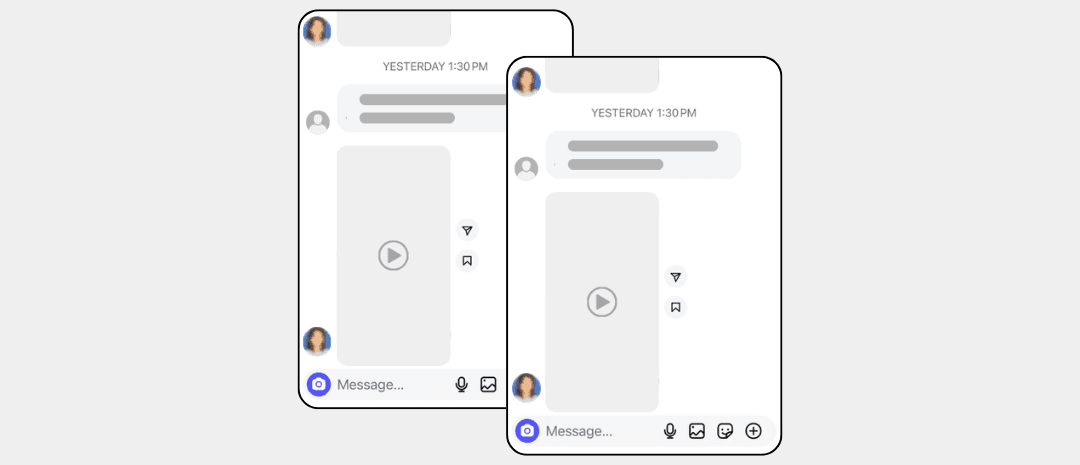
Connecting strangers
The TikTok feed includes posts and reels from strangers, not just friends and connections. It's possible for you to connect with and private message them, which might be a problem for some people.
Recommended approach for restricting yourself from using TikTok on a Windows computer
Here's a summary of the most effective way to block yourself from using TikTok on a Windows computer so you can prevent yourself from having accessing it. We'll go into each step in detail in the sections below.
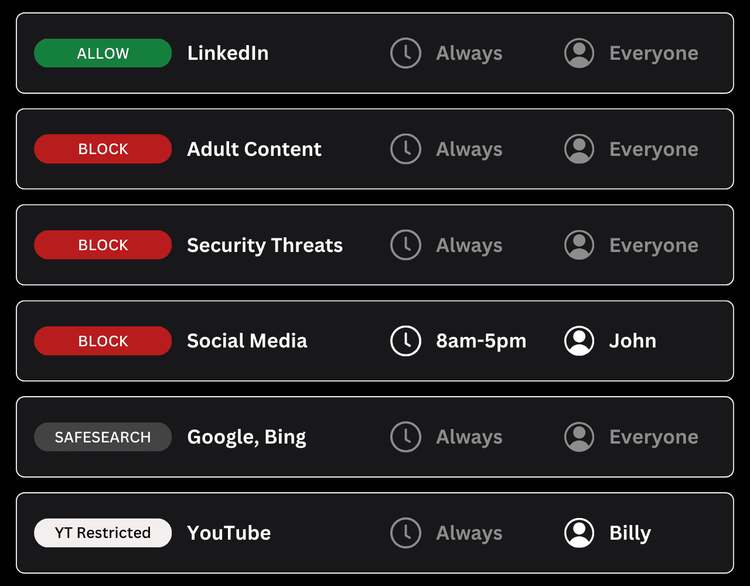
Enable a DNS Content Policy
We recommend setting up a DNS Content Policy on your Windows PC, which gives you more control over TikTok and other content. For example, you can use a default-deny approach to block all social media apps other than the ones you know to be safe. You can also schedule access to TikTok so that it's only available during certain times of the day.
Optional: Hosts file entries
You can also add entries to the hosts file on your Windows computer to block TikTok.
Here's how it works:
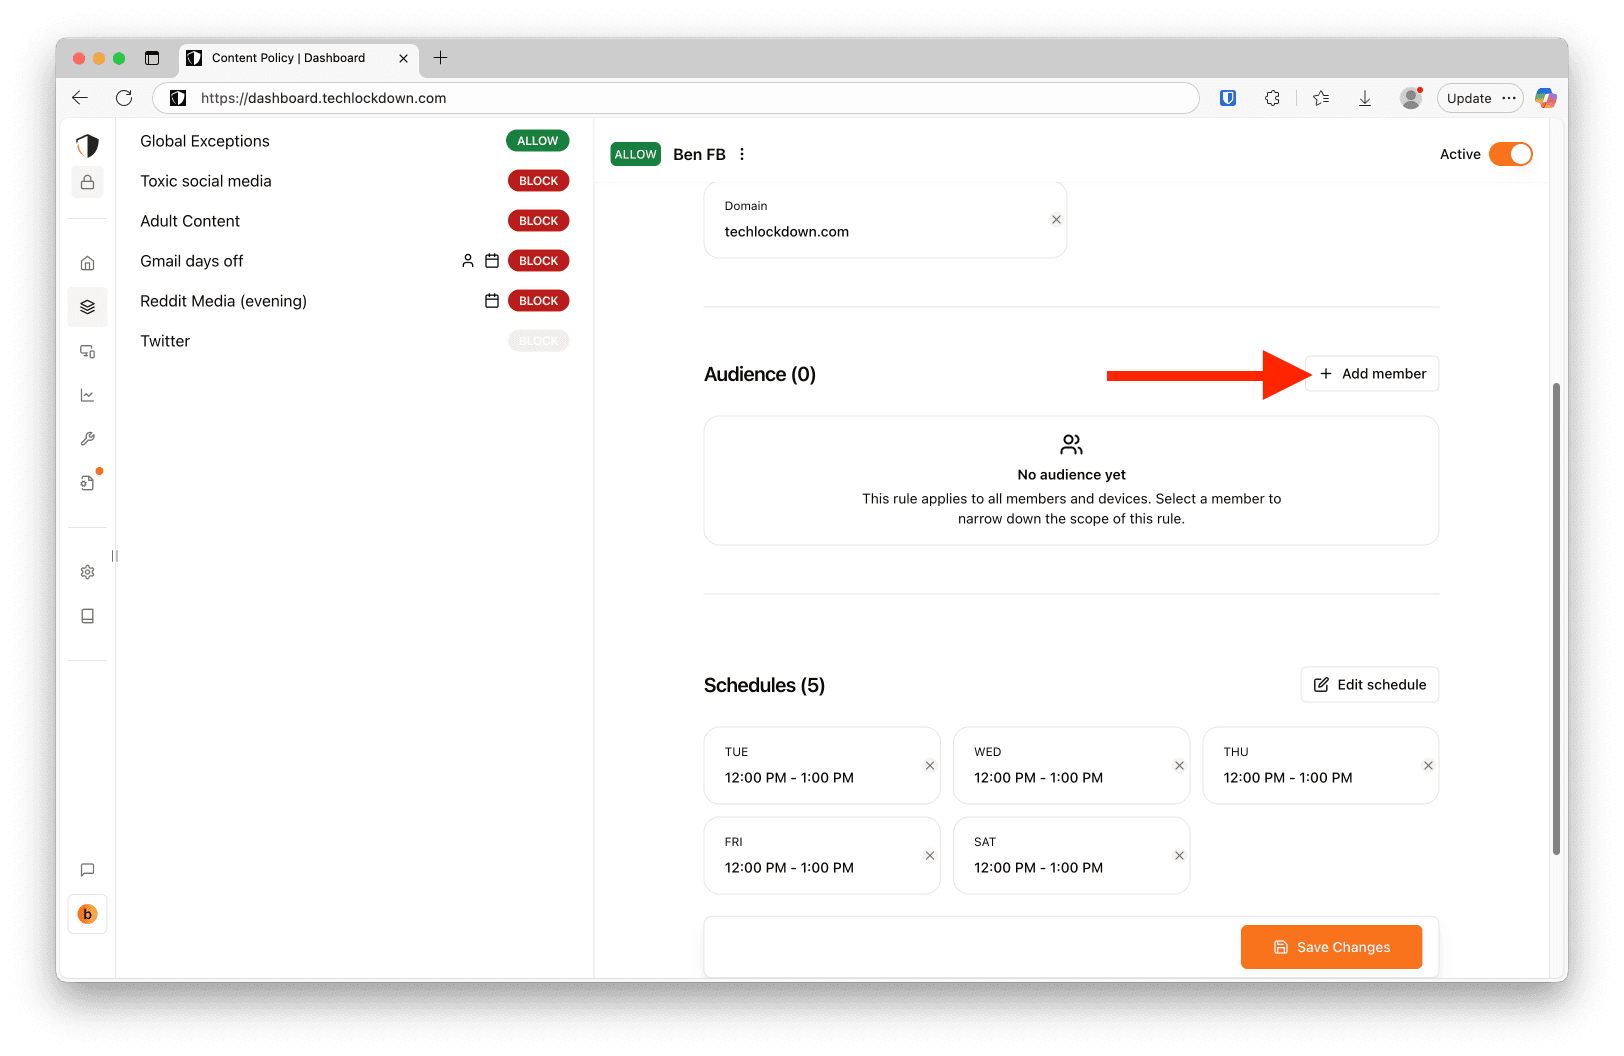
Add a new block rule
In the Tech Lockdown dashboard, go to the Content Policy section and add a new block rule with TikTok selected
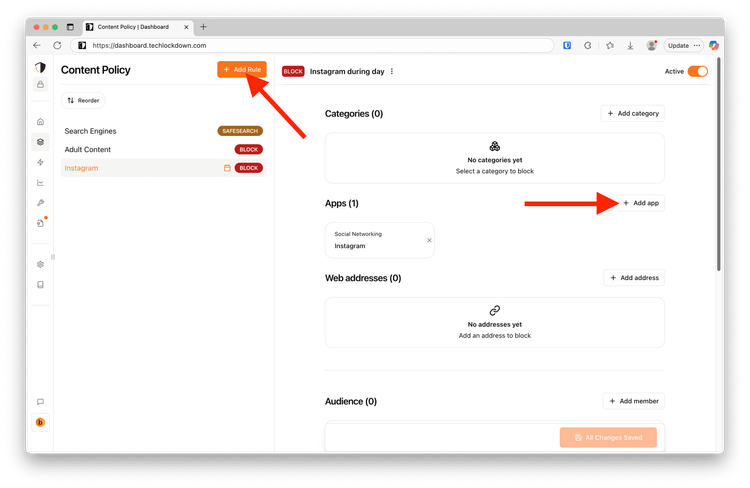
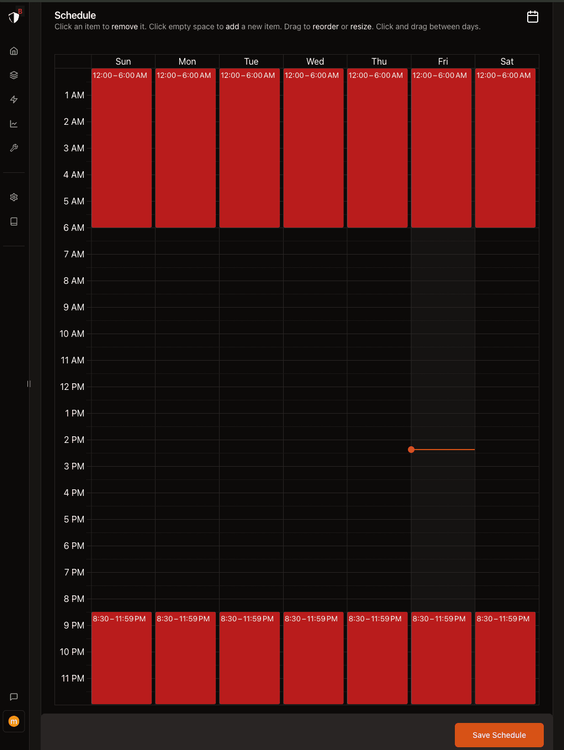
Customize the schedule
Select a schedule if you want to only block TikTok on specific recurring days and times. Otherwise, leave the schedule blank to block TikTok 24/7.
Specify who the rule applies to
Select an audience if you want to only block TikTok from specific people. Otherwise, leave the audience blank to block TikTok from everyone.
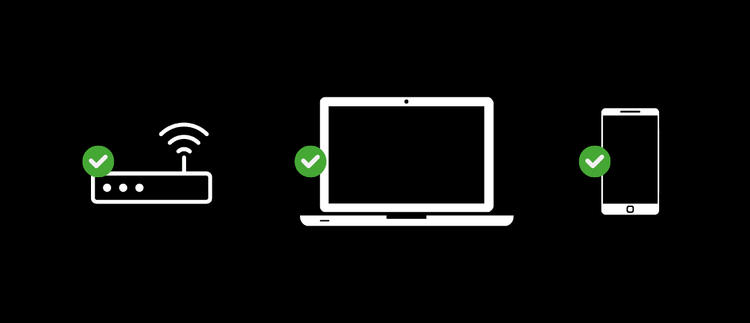
Connect Devices
Go to the Devices section of the Tech Lockdown dashboard and follow the setup instructions to connect devices to the Content Policy
Optional: Lock your Tech Lockdown Profile
If you are self-restricting access to TikTok, you can lock your Tech Lockdown profile so that you have to wait a certain amount of time before you can unblock TikTok.
Block TikTok on a Windows computer using the hosts file
It's possible to block TikTok for free on Windows by using the hosts file to block a website.
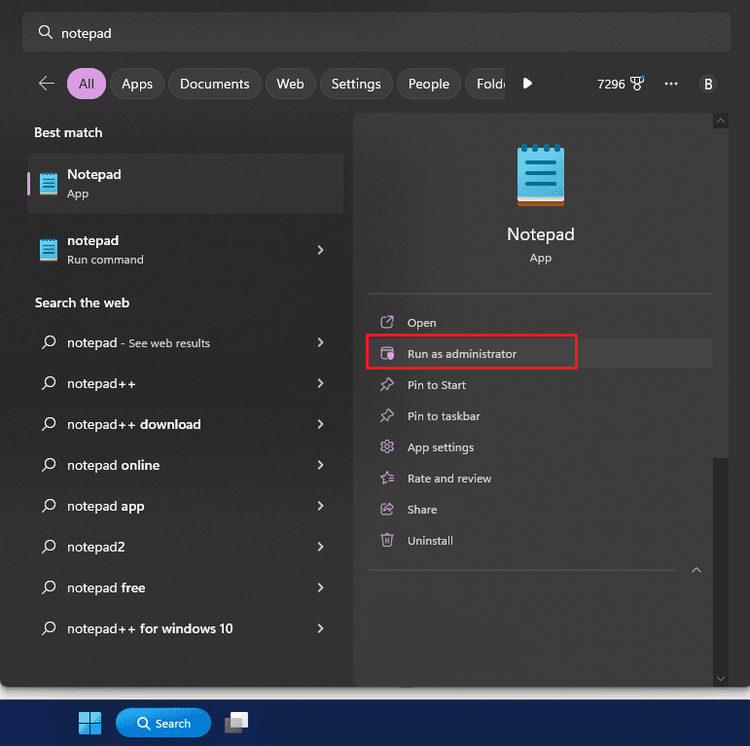
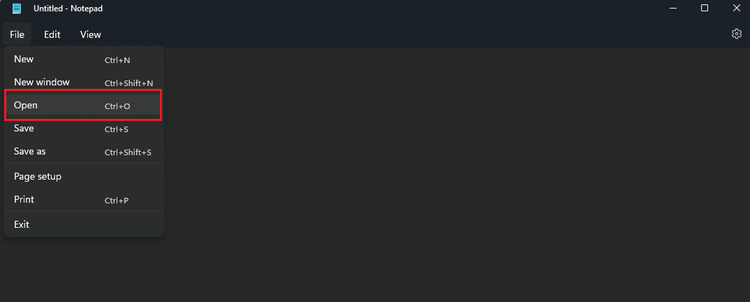
Open Notepad as Administrator
Right-click on Notepad and select 'Run as administrator'
Find the hosts file
In notepad, click file > Open, then navigate to C:\Windows\System32\drivers\etc
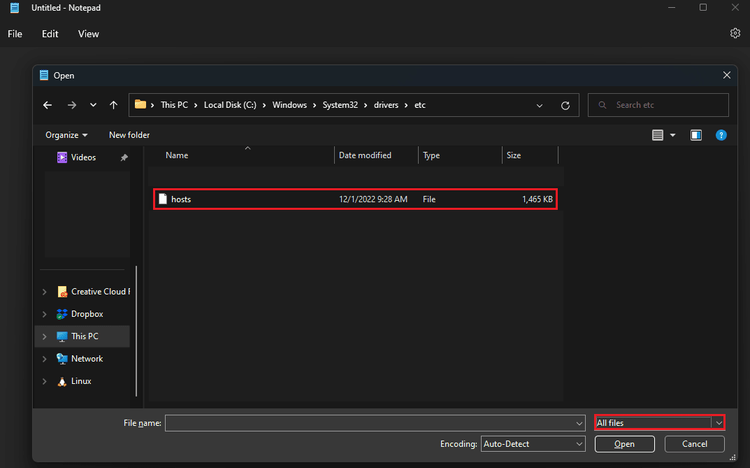
Open the hosts file
Select "all files" then open the hosts file
Add the TikTok hostname entries
Add the following entries to the bottom of the hosts file:
0.0.0.0 tiktok.com
0.0.0.0 www.tiktok.com
Save file
Save the file to the location where the hosts file was opened
After making this change, it could take a few minutes for the change to take effect. You can speed this up by flushing the DNS on Windows. To flush the DNS on Windows, open a command prompt as administrator and run the following command: ipconfig /flushdns
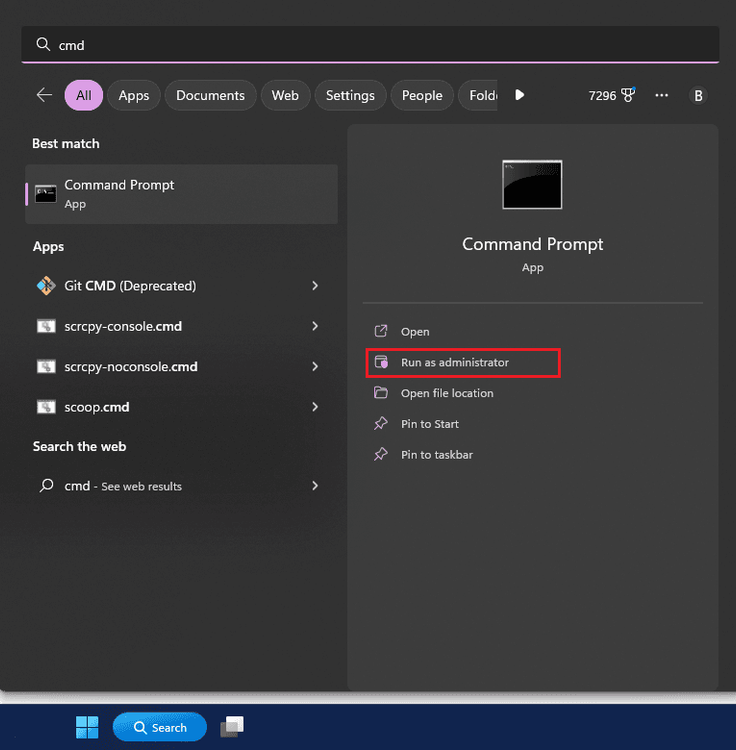
Open Command Prompt as Administrator
Right-click on Command Prompt and select 'Run as administrator'
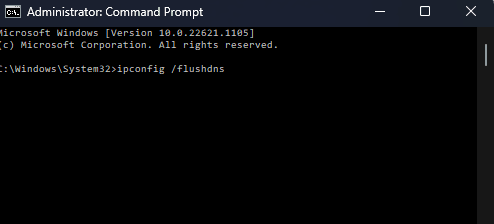
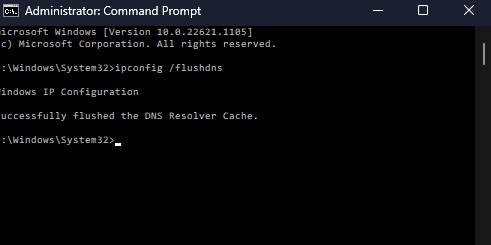
Enter the flushdns command
In the Command Prompt window, enter the following command: ipconfig /flushdns
ipconfig /flushdns
Fun command
Press Enter to run the command
How do I prevent myself from editing the hosts file on Windows?
If you're using the hosts file to block yourself from TikTok on your own Windows, you might be wondering if there's a way to prevent yourself from simply editing the hosts file and removing the TikTok entries. There are a few options for doing this:
- Modifying the hosts file requires administrative privileges. You could switch to using an non-administrative account. This is the best option if you feel you have a serious addiction to TikTok and are willing to sacrifice significant autonomy when using your own Windows PC.
- Use a Windows program blocker that allows you to password protect specific files and programs.
- Use multiple blocking methods so that removing TikTok entries from the hosts file doesn't allow TikTok to work.