Dumb Phone
The Ultimate Guide for Creating a Dumb iPhone
Keep your GPS and camera. Make your iPhone dumber by restricting the more intrusive features like web browsing and the App Store.
Modern iPhones have awesome features, like Apple Maps and a sharp camera. But some of us want to rewire the bad habits caused by the iPhone, and don't want to go back to using a flip phone. What if we could just make our smart iPhone into a dumb iPhone?
Fortunately, there are ways to maintain access to features we can't live without (like GPS navigation and Apple's amazing high-resolution camera), while greatly restricting the more intrusive smartphone features (like web browsing and the App Store).
Choosing a Dumb iPhone Configuration
There isn't a one-size fits all approach to creating a dumb iPhone. It depends on your specific situation and why you're considering a dumb phone in the first place.
For example, here are some common use-cases:
- Heavily restricting or eliminating internet browsing in an effort to completely block porn on iPhone (whether you're an adult or configuring a phone for a child).
- Eliminating the possibility of accessing problematic apps in the App Store. This can be an effective way to completely block all gambling apps .
- Significantly reducing dopamine so that you're more present and less attached to your iPhone.
Level 1: A Distraction-Free iPhone
We recommend getting started by focusing on eliminating and reducing many of the distracting iPhone features.
Here's a checklist for what I'd recommend for a distraction-free iPhone (click to jump to the section in the guide):
Level 2: A Non Habit-Forming iPhone
The next step is to manage how apps can be opened or downloaded, as well as controlling the Safari browser (or whatever browser you use). This approach involves removing cues that encourage you to open or browse apps. By removing these cues, you can more easily break bad screen time habits and spend the least amount of time on your iPhone as possible.
For a Non Habit-Forming iPhone, I'd recommend combining techniques for a Distraction-Free iPhone and:
Level 3: A Completely Dumb iPhone
A Completely Dumb iPhone has a very limited number of features. Only a few, specifically selected apps are enabled (like Maps, Camera, and Phone), and nothing else. Some other bonuses to include would be completely disabling web browsing and the ability to install or delete apps, as well as removing all possible cues.
This is the most restrictive version of a dumb iPhone, and it's not possible to reset without outside help. If you're an adult who is trying to self-manage your own iPhone, this is the best option I can recommend. Here's what I recommend (in addition to any other techniques available in this guide):
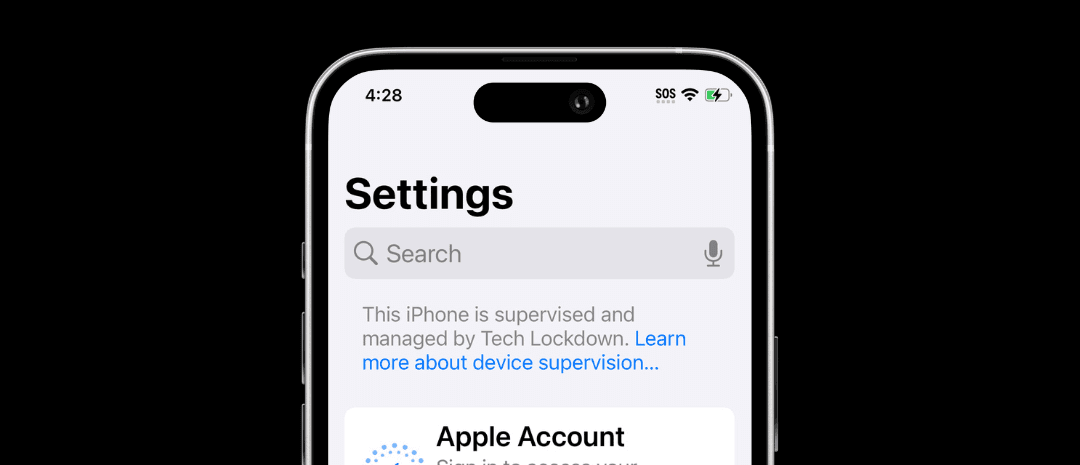
Supervised Mode May Be Required For Some Steps
A lot of the recommendations I'll explain in this article can be done on a standard, out-of-the-box iPhone without any additional setup. However, there are some of these restrictions that can't be done without supervised mode, since it changes permissions on your iPhone and allows more granularity with controls.
If a technique requires supervised mode or could be enhanced with it, I'll very clearly explain how it applies.
If you'd like more information about how this works or how to get started, check out our supervised mode resource for more information.
Manage and Simplify Notifications
There's a fine line between text messages or phone calls from your family, or a news app sending you another article recommendation. Most apps require permission to push notifications to your iPhone, so you can manage these permissions or control how notifications are presented to you to significantly reduce distractions.
None of these restrictions require supervised mode.
These settings are managed on your iPhone by going to Settings > Notifications.
Limit how Notifications are displayed on your iPhone
Use Scheduled Summaries for Apps Instead of Push Notifications
Scheduled summary can be used to better manage app notifications for apps that you'd rather not completely disable.
When an app's notifications are set to appear in a scheduled summary, you won't see notifications immediately. Instead, you'll see these notifications grouped at certain times of the day.
Disable Notifications for Apps
It depends on which app you're setting up, but here are some of the settings you can configure per app:
- For social media or news apps, you can view all notifications in your Scheduled Summary.
- Disable Sounds and app Badges .
- Choose whether notifications from this app also appear on your Mac computer. Personally, I've disabled this feature for iMessages since it's the default.
Use Widgets for Some Apps
Widgets can be a useful way to avoid needing more notifications. There are several options you can consider, but I've included the ones I've found to be very useful in reducing the amount of time I spend on my iPhone.
First, you'll need to know how to access and add Widgets to your Home Screen.
Here are the one's I found useful:
It's fairly easy to view iMessages or Phone calls from these contacts without needing to keep the iMessage or Phone apps on the Home Screen. I'd recommend using this for close friends and family.
Combine Notification Settings with Focus Modes
Focus Modes are a powerful feature that I'll cover later in this guide, but you can further customize notification settings based on specific people in your Contacts list or specific Apps, all scheduled for certain times of the day.
Make Your iPhone Less Interesting With Accessibility Settings
Accessibility settings are typically used to improve readability or navigation, but there are some specific settings you can consider that can be used to make your iPhone far less distracting.
None of these restrictions require supervised mode. However, I'll explain how you can use supervised mode to lock passcode settings, like Face ID.
These settings can all be managed on your iPhone by going to Settings > Accessibility.
Manage Text and Color Filters
You can make your iPhone feel more like an e-reader by using Display settings. When done, your iPhone should look something like this:
To enable Grayscale mode for that E-reader feel...
Here are the settings I recommend for making Text less interesting:
Reduce animations in apps and on iOS
You can also reduce animations to further make your iPhone less interesting.
Disable Tap and Haptic Features
Haptic Features are typically used by your iPhone if you've switched to Silent or Do Not Disturb mode.
Use a Passcode instead of Face ID
Using Face ID to unlock your iPhone is convenient, but there are certain restrictions I'll recommend further along in this guide that are made significantly better by using a PIN instead.
For example, later on, I'll explain how you can use iOS 18's "Hidden Apps" feature to add friction when opening an app. If you have Face ID enabled, then this is a lot less of an easy restriction.
Note that if your iPhone is supervised, you can restrict changes to Passcode settings completely with a Config File . This will mean that searching the Settings app will completely hide all Face ID or passcode settings from the user, making it impossible to change this without outside help.
Simplify the Home Screen
The home screen of your iPhone facilitates compulsive app and internet use.
The goal with these customizations is to ensure that you have to think about what you want to access rather than your iPhone cuing you.
Use Spotlight Search as a minimalist App Launcher
Instead of opening apps from the Home Screen, we recommend forcing yourself to use Spotlight search so that you have to manually type in the name of the app you'd like to open. This ensures that you are more intentional with the apps you use.
Now you'll need to use Spotlight Search to access these apps. Here's how to open it from the Home Screen:
Automatically Hide Newly Downloaded Apps from the Home Screen
By default, when you download a new app from the App Store, it gets added to your iPhone's Home Screen page. You can prevent this by automatically moving new apps to your App Library instead, without needing to do it manually each time.
Note that this only impacts the difficulty of opening an app for the first time in a while. This also doesn't restrict the App Switcher , but I'll go over how you can work around that as well later in this guide.
Hide Addictive Apps from Spotlight Search
You can make certain apps even more difficult to access by removing them from both your iPhone's Home Screen and Spotlight Search results. Select the apps that you most want to reduce usage of, not all apps.
You should see a list of settings for each app installed on your iPhone. For each app you want to remove from Spotlight search, tap on its icon.
You should see a screen like this:
To open apps that you've hidden this way, open your App Library by going to your iPhone's Home Screen, then swiping left until you see a screen like this:
All apps can be searched from here:
Hide Web Results in Spotlight Search
Another annoying thing you might notice from Spotlight Search is how Internet or Safari results will be displayed to you each time you search. You can disable this feature completely using both standard settings and supervised mode.
For standard iPhones, this can be done manually , but it's a bit tedious and not enforceable.
If it's important that this setting can't be reverted, you'll need to use Supervised Mode . For supervised iPhones, you can use Tech Lockdown's Apple Config Generator to protect this setting:
Use Shortcuts to Make Apps More Difficult to Open
There are some cases where you may not want to completely uninstall an app on your iPhone, but you'd like to prevent it from being too easy, so you can't open it accidentally or out of habit. For example, you might use YouTube to watch video tutorials, but you want to reduce the ability for you to open it casually to watch time-wasting videos.
As a first step, I'd recommend using my recommendations for managing your iPhone's home screen, then come back to this section to complete your setup.
None of these techniques require supervised mode.
Replace your App icon with an Apple Shortcut
The Shortcuts app was developed by Apple and was added back in 2018. It's been updated ever since, and it can be used to add extra friction to apps if you try to open them. In this example, I'll apply this restriction to the YouTube app.
First, we need to make sure that YouTube is removed from the Home Screen and Spotlight search (you'll see why we're doing this after we've finished the setup).
This Shortcut is empty, but I should be able to search for it and see it using Spotlight search. Since it's empty, it doesn't do anything yet.
Add a confirmation menu when you open an app
This adds a confirmation message that pops up each time you run the automation.
On your iPhone, you would open Spotlight Search and search for the Shortcut you created. In this example, I would search for YouTube:
Instead of opening YouTube straight away, I'm presented with a confirmation menu:
Add a time delay when opening an app
Now, you can add more layers to further restrict how easily the app can be opened.
The notification doesn't do anything other than let you know that you'll need to wait a few seconds. You can make the message short and sweet, like "App will open after delay".
That's it! Your Shortcut should be ready and can open your app. You can use the approach with more apps by repeating the same process with a new Shortcut, one for each app you want to restrict. You can speed this process up by duplicating the same Shortcut multiple times.
Require your iPhone's passcode each time you open the app
While the Shortcut(s) you've just created are pretty powerful, you might notice that you can still use the App Switcher if you've recently opened the app.
To get around this, I'd recommend requiring a passcode for the app. You can do this using Apple's Hidden Apps feature.
If you're managing your own iPhone, I'd recommend disabling Face ID if it's enabled. Otherwise, when you hide an app, you'll be prompted to use Face ID. You add more friction with a PIN.
(Optional) Restrict Access to an App using an Automation
Shortcuts also has a powerful feature called Automations, which are like Shortcuts, except they activate based on a specific trigger.
You can have Automations trigger based on all kinds of triggers:
- When an app is opened or closed
- When you connect to or disconnect from a Wi-Fi network
- When you arrive at a specific location
- At a specific time of day
I mainly use Automations to enforce my content filtering VPN , since iOS can be inconsistent with automatically reconnecting a filtered VPN connection when I rejoin a Wi-Fi network.
Create Your Own Focus Mode To Remove Distractions
Focus Mode was introduced with iOS version 15, but it's been expanded in recent updates to be even more powerful for removing distractions. You can use Focus Modes to further refine notification settings, or even hide specific home pages if you use my Shortcut recommendations.
None of these techniques require supervised mode.
Creating your own, personalized Focus Mode
You could edit one of Apple's default Focus Modes, but I'd recommend creating your own.
Choose apps or people to receive notifications from
Focus Modes can be used to limit notifications with more granularity. For example, you can add People from your Contacts or App that will be able to show you notifications.
Hide home screen pages that have Shortcut widgets
If you have Shortcuts on your iPhone that are used to open apps, then you can hide them from your Home Screen using Focus Modes.
For best results, I'd recommend moving all of your Shortcuts to the same page, then hiding just that page with your Focus Mode.
Add a Schedule
Focus Modes can be schedules based on a few criteria:
- At certain times each day
- When an app is opened
- When you arrive at a location
If you're trying to hide a Home Page full of Shortcuts, I'd recommend setting a schedule that applies at all hours of the day for the entire week.
Manage Apps and Safari with Screen Time or Supervised Mode
Now we can get into some of the advice that can be enhanced with supervised mode.
Screen Time is a feature originally released back in iOS version 12, which has been steadily updated ever since. While I personally prefer supervised mode as a more powerful alternative to screen time , it can get the job done in some cases.
It's especially powerful if you're a parent who's managing your child's Apple account using Apple Family. If you're an adult self-managing your own restrictions, I'd strongly encourage using supervised mode instead.
Screen Time Settings can be managed from the Settings app under the Screen Time menu.
Supervised iPhones use Config Files to enforce the same restrictions as Screen Time, although they can enable more restrictions and are more difficult to remove without outside help. Config Files need to be created, and if you're a Tech Lockdown member, you'll have access to our Apple Config Generator to customize and install your own.
Restrict app installation, removal, and in-app purchases
Here, you can manage whether apps can be installed from the App Store, deleted from your iPhone, or have purchases enabled.
If Installing Apps is restricted, then the App Store will be completely disabled. This will mean that currently-installed apps will not stay updated. If you need to generally block apps from being downloaded while keeping current apps up to date, consider enabling supervised mode .
Restrict apps and other content based on age rating
If you don't want to restrict all apps from the App Store, you can choose an age-rating for apps instead.
Here, you can choose the rating for most kinds of content available on iPhone, including Apps
Note that this can also be done using Tech Lockdown's Config Generator .
Block Adult Content automatically in Safari
You can also enable Apple's Built-in Adult Content Filter for Safari.
Add specific websites to your iPhone's blocklist
Note that this can also be done using the Tech Lockdown Config Generator .
Restrict other unnecessary iOS features
You can also choose to disable other features using Screen Time. I'd pay careful attention to items listed under App Store, Media, Web, & Games.
Supervised Mode Restrictions for a Completely Dumb iPhone
While many quality-of-life changes can be made using only a combination of the Settings app, parental controls, and the App Store, advanced techniques can be used to more directly control features on your iPhone for a highly minimalist setup.
Supervised Mode unlocks more powerful restrictions than are typically possible otherwise, such as supervised app blocking , supervised website blocking , and settings protection . For adults setting restrictions on their own devices, this is much more powerful than parental controls, since your restrictions can't be removed from your iPhone without outside help.
Create an App Allowlist
You can customize your own Supervised App Allowlist to completely restrict all apps except the ones you add to your allowlist.
As an example, I went ahead and blocked all but a small collection of apps on my iPhone. I wanted to keep things focused, so I didn't include any web browsers or the App Store. Here's what my app library looked like afterwards:
Later on, you might find that you need to edit your list to include another app, such as Apple Photos or Reminders. Using the Tech Lockdown dashboard, I'll update my list like this:
Afterwards, I installed this Allowlist onto my iPhone by scanning a QR code.
As of iOS 18, it's possible to download apps from outside of the Apple App Store through third-party app stores. Luckily, this allowlist approach will apply regardless of where the app is downloaded from.
If this Allowlist approach is too restrictive, you can use a blocklist approach instead, where all apps are approved unless you add them to your restricted apps list . This works for the App Store app itself and any other app available on the App Store.
I can also go further by specifying an age rating for apps, and I won't be able to use any app above the specified age rating.
Block Website URLs
Supervised mode unlocks the ability to use supervised website blocking , which applies to Safari and most other browsers.
If a website is blocked (for example, I've blocked an example website below), then Safari will refuse to load the page.
While this approach is similar to Screen Time, it's a more enforceable option that is better suited for adults who self-manage their own device and can't rely on a four-digit PIN.
Completely Disable Web Browsing
It is also possible to completely restrict web browsing on your iPhone entirely. This can be done with Screen Time or Supervised Mode.
With Screen Time, make sure you enable Content & Privacy Restrictions.
Note that this is a highly restrictive setup. If you lock Screen Time settings, then the only way to undo this is to unlock Screen Time.
Protect Settings That Could Be Used to Disable Dumb Phone Restrictions
There are some cases where you need to ensure that dumb iPhone restrictions can't be disabled. For example, you might want to prevent your iPhone from being Factory Reset.
Supervised mode has access to more restrictions than normally available in the Settings app that protect settings on your iPhone and ensure they can't be disabled easily.
Restrict Adding VPNs
If you're using a content filtering VPN on your iPhone, chances are that you want to protect this VPN and prevent it from being deleted.
Normally, a standard iPhone would have the option to add a VPN from the settings page.
However, if you install the Config Preset on a supervised iPhone, this option is removed.
As of iOS version 18 and up, apps will no longer be allowed to add VPN configurations as well.
Disable the App Store While Keeping Current Apps Updated
Disabling the App Store is a great idea if you want to prevent new apps from being downloaded. I'd recommend checking out our dedicated guide to disabling the App Store for information.
Prevent Deleting Apps
There are cases where it's important to ensure that an app can't be deleted from your iPhone. For example, you might need to enforce a content filter so that it can't be disabled.
Supervised mode can completely remove the option to delete apps. The only way to undo this restriction to remove an app is to first remove the Config File that enables the restriction.
Filter your iPhone's Internet for a Distraction-Free Experience
If you're looking for a way to filter content on your iPhone, a DNS Content Policy lets you apply rules to your iPhone's internet usage in a more comprehensive way compared to iPhone Screen Time. This is a great way to block apps or websites, enforce SafeSearch , and schedule internet usage.
You can enforce a content filtering VPN connection on your iPhone, allowing you to comprehensively block unapproved websites.
Here are some DNS Content Policy ideas you can use to customize the internet access on your new dumb iPhone.
Block YouTube Thumbnails
Make YouTube less interesting by blocking clickbait thumbnails.
For example, I can update my Tech Lockdown Content Policy to include a Block rule for YouTube images:
This causes YouTube thumbnails to not display, whether in the browser or the app.
Schedule Internet Usage
Another strategy I use for a dumber iPhone experience is to schedule when I can use distracting websites and apps that tend to make my iPhone feel way too appealing.
For example, I unblock news and certain social media apps on my lunch break. Otherwise, these websites and apps are blocked:
You can use this same approach to block the entire internet at night on your iPhone.
Block Categories and Apps
You can block hundreds of categories of online content:
Or pick specific apps that should be blocked:
For example, within my Tech Lockdown Content Policy , I've created a few rules that always block TikTok , Security Threats, and Adult Content and even enforce SafeSearch on Google, Bing, and other supported search engines.
Default-deny Blocking Approach
One option that is particularly relevant to a dumb phone setup is a default-deny approach.
This means that you block everything by default, but selectively allow access to a few apps. For example, you could block the social media category but allow access to only LinkedIn on your iPhone:
You could apply this same concept to broader categories by blocking access to all categories and only allowing access to a useful app like Google calendar:
To prevent myself from simply logging in and bypassing these rules, I lock my Tech Lockdown profile.
This ensures that I can't compulsively make the Content Policy less restrictive but I can still add to it.

Frequently Asked Questions
These are some of the most frequently asked questions when it comes to creating a dumb iPhone.
How strict of a device can I get without device supervision?
You can get a moderately restrictive setup using a standard, out-of-the-box iPhone. For example, you could enable grayscale mode, set limits for apps, enforce a screen downtime, hide apps from the home screen, and disable the App Store.
This approach isn't perfect. Most of these restrictions rely on Screen Time, which is too easy to disable, unfortunately.
I can't Supervise an iPhone, what else can I do?
Device supervision is the recommended dumb iPhone approach, but you can also hack together some dumb phone configurations with Apple Screen Time .
You can enable "default-deny" website blocking in the Web Content section of Screen Time. This means that you specifically set which websites the iPhone is allowed to visit and everything else is blocked.
You can also disable the iPhone's app store so that new apps can't be downloaded in the iTunes & App Store Purchases section of Screen Time.
Once you disable installing apps, the App Store icon will disappear from your app list.
A better way to disable the App Store is to use the supervised device mode we talk about later on because it allows automatic app updates.
You can also go to Settings > Screen Time > Content & Privacy Restrictions > Content Restrictions > Apps, then set this to Don't Allow. See also our dedicated guide: Block VPN Apps on iPhone .